How to Make an Art Bot Using a Vibration Motor
In this tutorial, yous will acquire how to make an Art Bot which is also known equally a Scribblebot or Scribble Auto. These contraptions use a vibrating or offset motor to move around in unpredictable ways.
Making an Art Bot is a fun way to learn the basics of creating a simple circuit with a switch. The best part of making these bots is that y'all can use repurposed and recycled materials.
This project is also a peachy style to incorporate more Art into your STEM education program. You can use markers, crayons, chalk and more than to create one of a kind artwork.
In one case you learn the build concepts, you can experiment with unlike designs. Every change to your bot will go far move at a different speed and in different patterns. Have fun!
Materials Needed
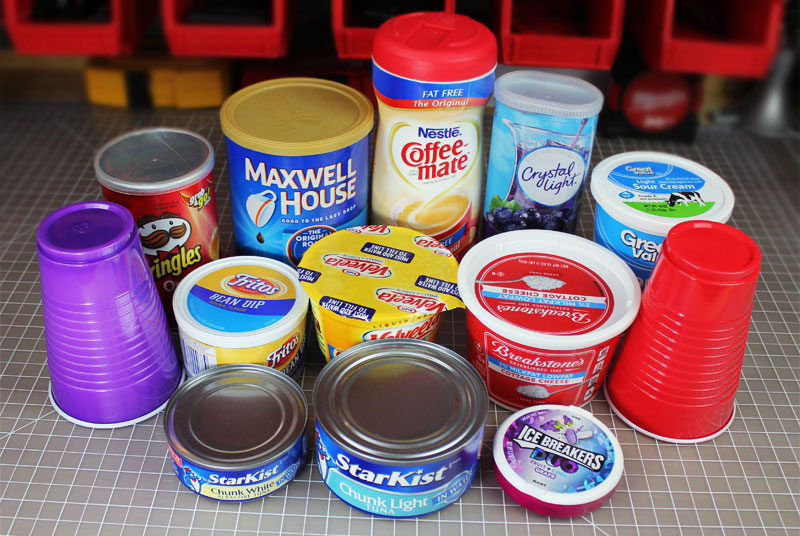
This project doesn't need to toll a lot because you can use everyday items that you lot already have. Hither are a few examples of containers that work well to create the Art Bot base of operations. Apply your imagination and become creative.
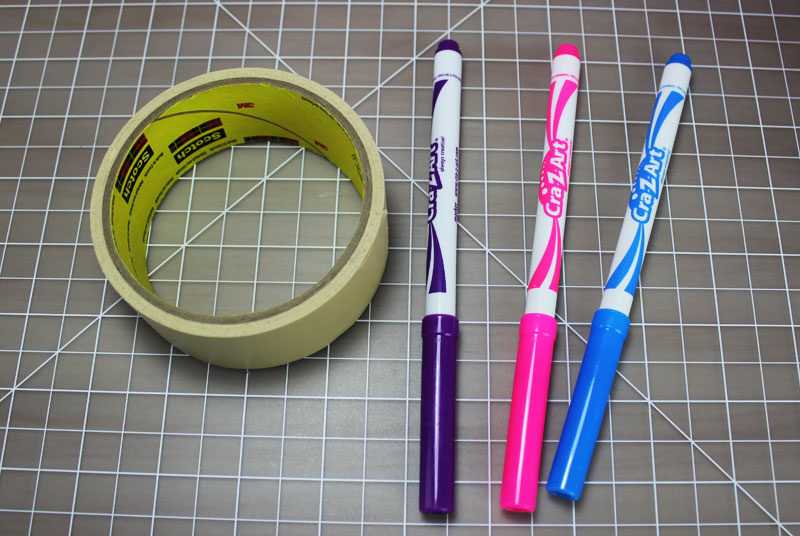
One time y'all have selected your base, you will demand a few other materials as listed below.
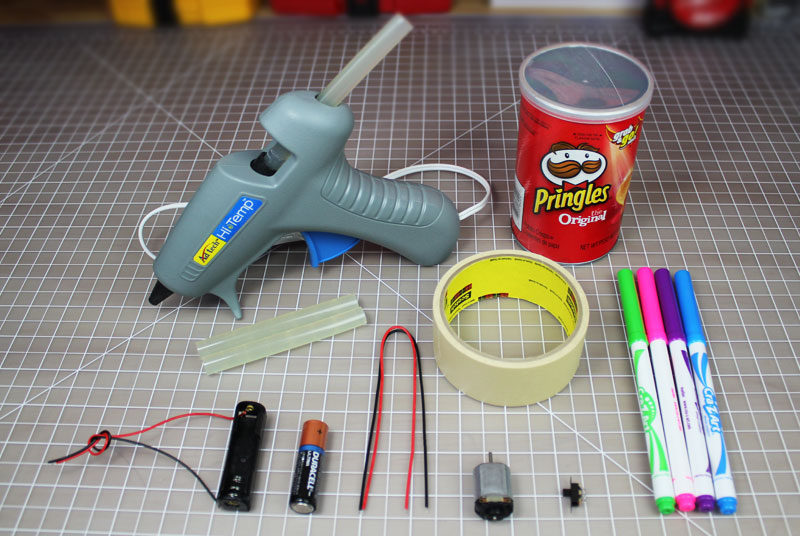
- Hot Mucilage Gun (Use Caution)
- Glue Sticks
- Tape
- Markers
- AA Battery Holder
- AA Battery
- Wire
- DC Motor
- Switch
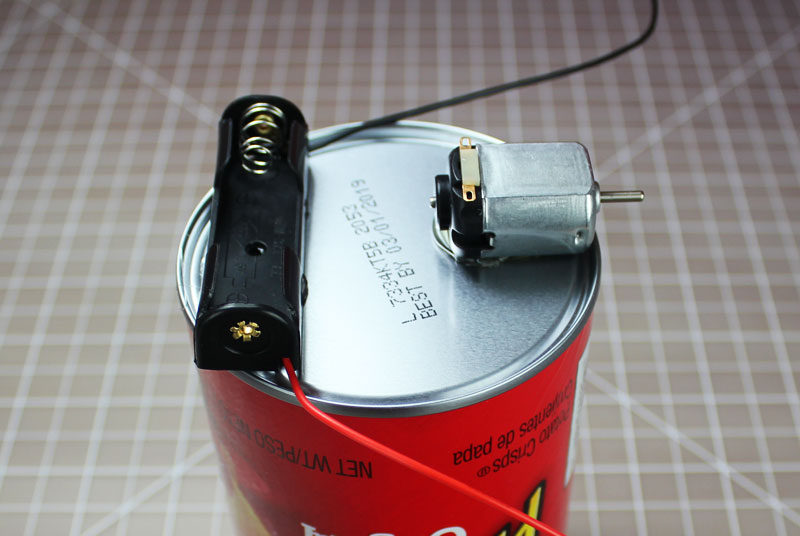
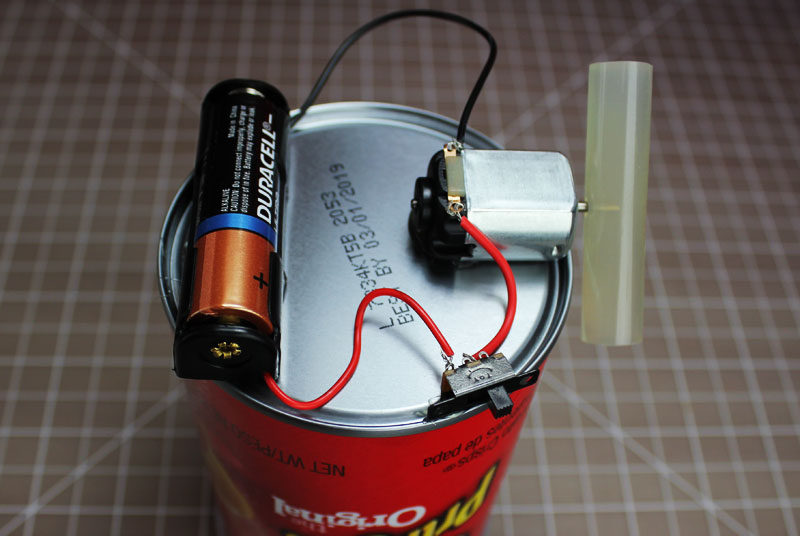
Stride 1: Mount The Motor
Before we starting time, plug in your hot mucilage gun and let it oestrus upwardly. Always make certain to never touch the tip of the glue gun. It's as well a good thought to accept cardboard nether the glue gun to take hold of dripping gum.
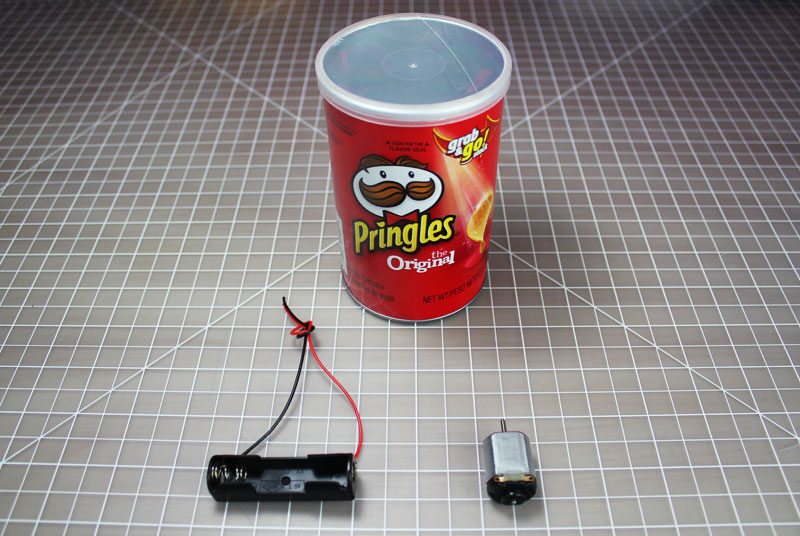
Glue the battery holder to one side of the container. Hold information technology in place for a few seconds while the hot mucilage cools down and hardens. Once that's complete, you can do the aforementioned with the motor. Make sure the motor is glued down as apartment as possible. Being at an angle will crusade the bot to move in unexpected ways.
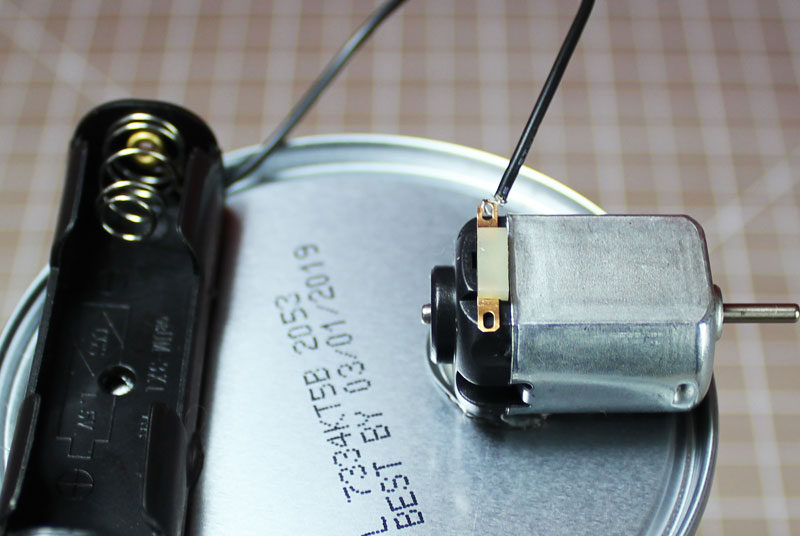
Footstep 2: Connect The Wiring
Now it's time to connect the bombardment holder to the motor. Take the blackness wire from the battery holder and twist information technology around 1 of the terminals on the motor.
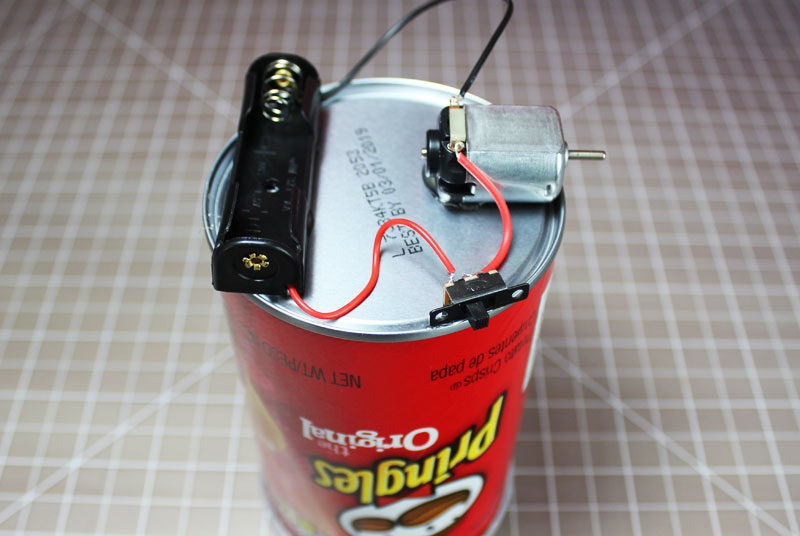
Twist the cherry-red wire from the battery holder to one of the outside terminals on the switch. You will then need to adhere a short ruddy wire to the middle terminal of the switch. Twist the other end of the red wire to the motor.
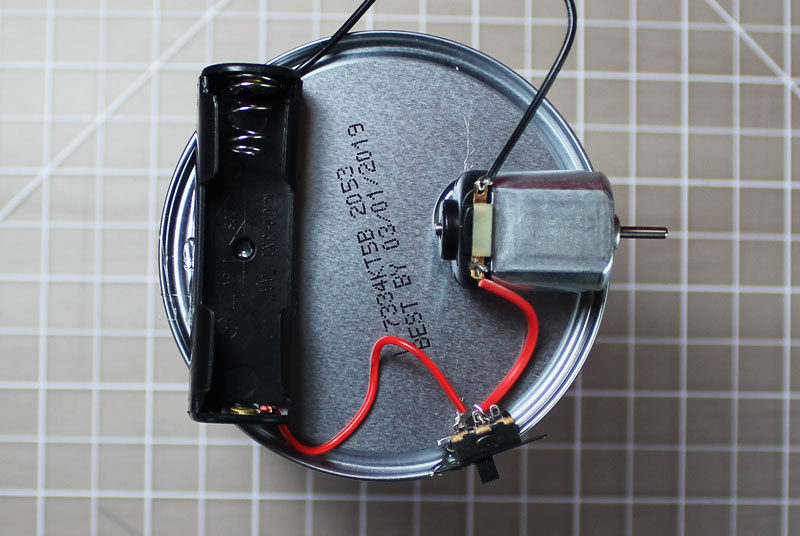
This is how the completed wiring looks like. Once everything is continued, you can hot glue the switch to the can.
Step 3: Adhere The Offset Weight
There are a few materials that work well for creating an commencement weight on the motor. Our personal favorite is to use a glue stick considering it attaches securely to the motor post. When testing, it is always a good idea to clothing safety glasses simply in case the weight comes loose.

Using an Ten-Acto knife, you will need to cut the mucilage stick to a 2″ section. Press the center of the glue stick to the motor shaft.
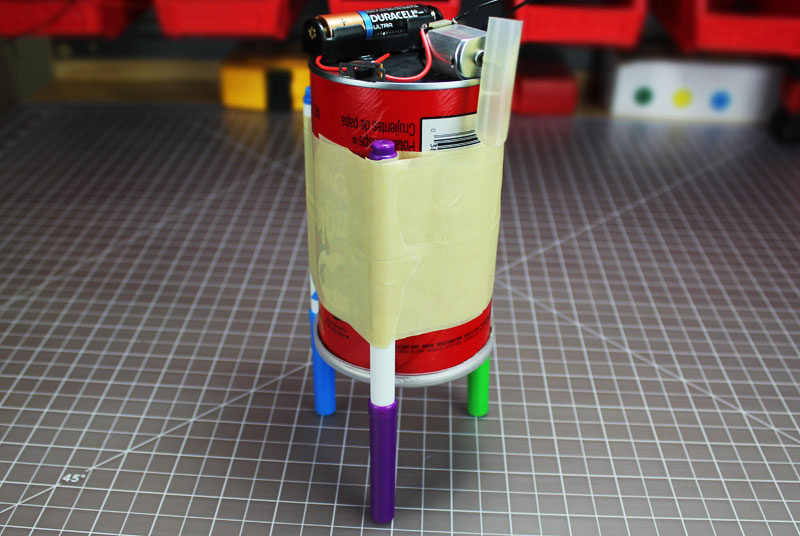
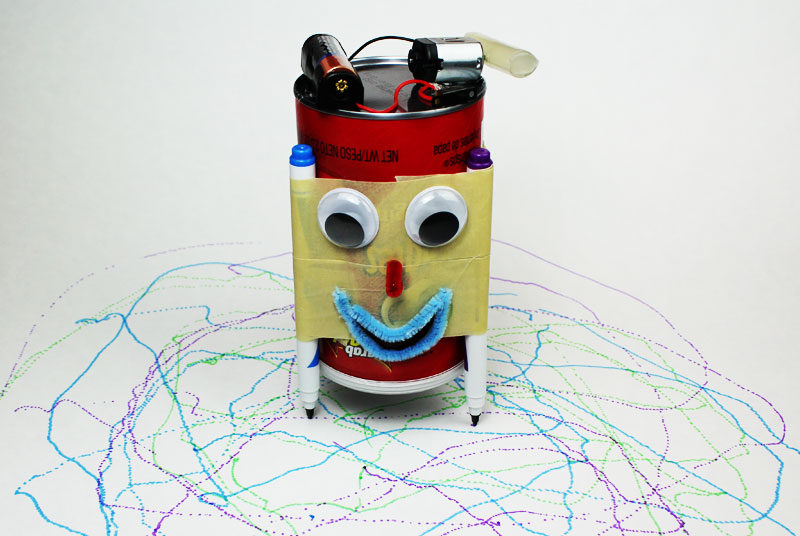
Step 4: Add Some Legs
Now information technology'southward fourth dimension to add the legs to your Art Bot. You tin apply markers, chalk, crayons or anything else that's similar.
Tape 3 to four legs evenly around the base using tape. Make sure the Fine art Bot is level to the ground and not tilting.
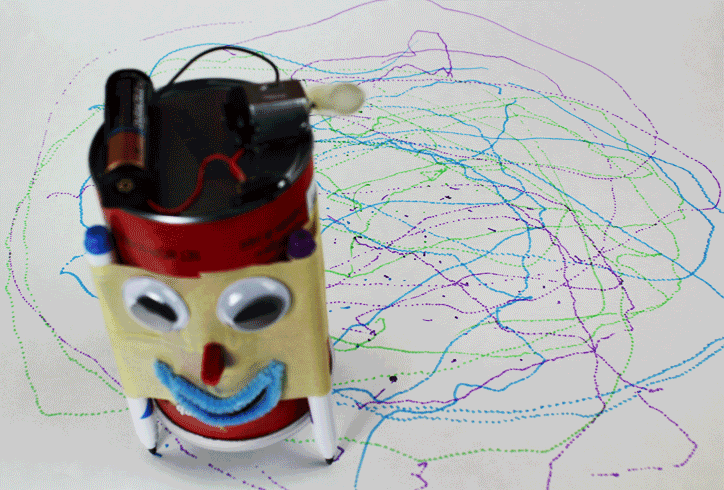
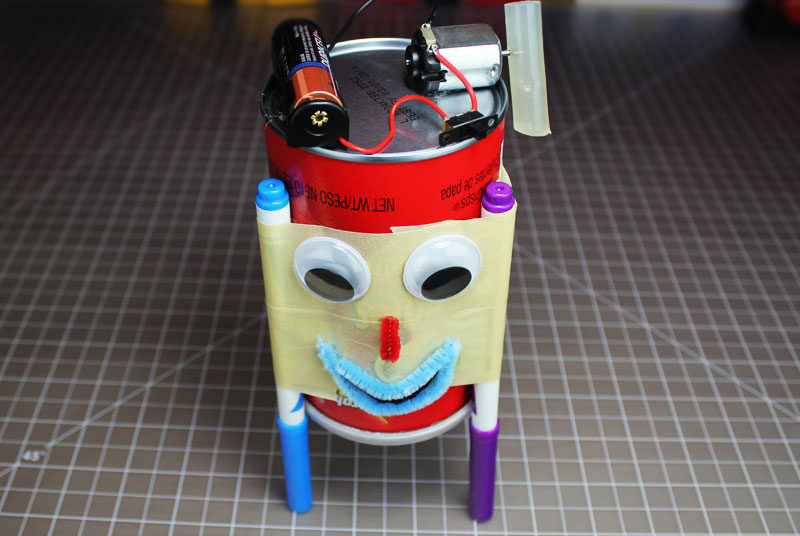
Pace 5: Decorate & Test
Go ahead and add together some personality to your invention. In one case complete, flip the switch on to see your cosmos come up to life.
Now it's time to experiment with different designs, shapes and materials. Try putting the mucilage stick off-center and see what happens. Also, try different lengths of glue stick from super long to super short. Y'all volition notice your bot moves faster, slower, and in crazy directions based on your design changes.
Show U.s. Your Bot !
We love seeing what everyone is working on. Tweet u.s.a. photos at@Makerspaces_com
If y'all're looking for more project ideas, check out our post that highlights 25 unproblematic makerspace projects for kids
Source: https://www.makerspaces.com/how-to-make-an-art-bot/
0 Response to "How to Make an Art Bot Using a Vibration Motor"
Post a Comment